Visit my co-host, Manic Mother!
We have spent the last month discussing and experimenting with ISO, Aperture, and Shutter Speed, the three elements often referred to as the three points of the Exposure Triangle.
It is at the intersection of these three elements that a picture’s exposure is decided.
Most importantly (and the most important thing to take away from today’s tutorial) is that adjusting one of these elements will impact each of the others. This means that you can never really isolate just one of the elements alone but always need to have the others in the back of your mind.
What is Exposure?
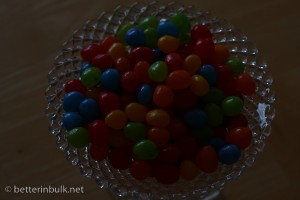
Exposure refers to how bright or dark your photo is. This is effected by the amount of light that is recorded by your camera’s sensor. A properly exposed photo should typically resemble the brightness of the original scene. A poorly exposed photo will either be too dark (under exposed) or too bright (over exposed), and may contain areas that are so dark or so bright that they contain no detail (know as being blown out).
An Analogy

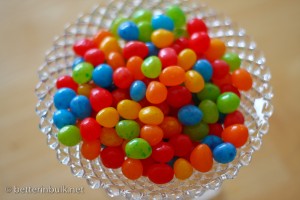
Photo by Jooliree on Flickr
I have heard this photo analogy in a few different settings. Let’s see if I can do it justice. Imagine your camera is like a window with shutters that open and close.
The size of the window represents the aperture. If the window is larger, more light gets through and the room is brighter.
The amount of time that the shutters of the window are open represents the shutter speed. The longer you leave the shutters open, the more light that comes in.
This might be a little bit of a stretch, but imagine that you are wearing your sunglasses inside the room. These sunglasses (and how dark they happen to be) represent the ISO. Your eyes become desensitized to the light that comes in.
There are several ways to increase the amount of light in the room…or at least how much light there appears to be. You could increase the time that the shutters are open (decrease shutter speed), you could increase the size of the window (increase aperture) or you could take off your sunglasses (make the ISO larger). If you wanted to room to be darker, you could close the shutters a little (increase the shutter speed), decrease the window size (decrease aperture), or put on some heavier sunglasses.
How To Adjust Exposure
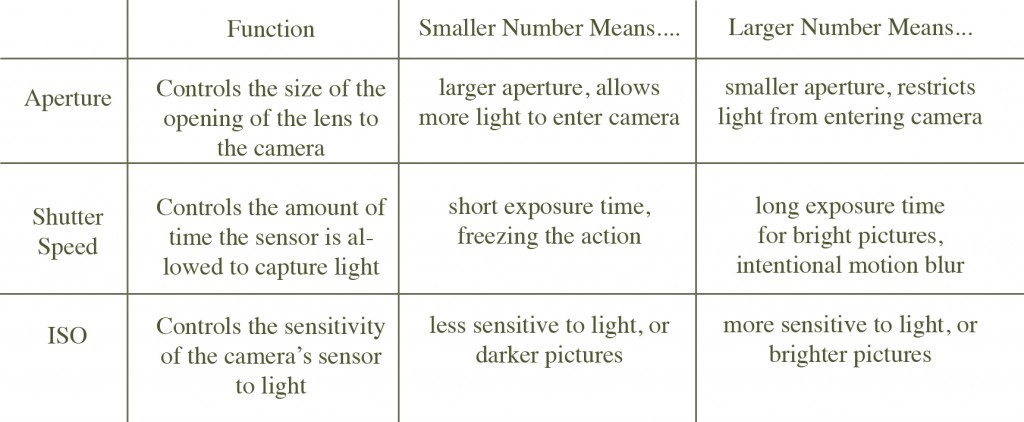
Since we’ve talked about each of the elements of the exposure triangle individually, I thought I’d bring everything together in a little Exposure Cheat Sheet (or two). These are saved as jpegs, and for this tutorial, I give full permission for individuals to print them out to carry with you. The first chart is a review of what each exposure element’s function is, and what happens when you adjust it on your camera.
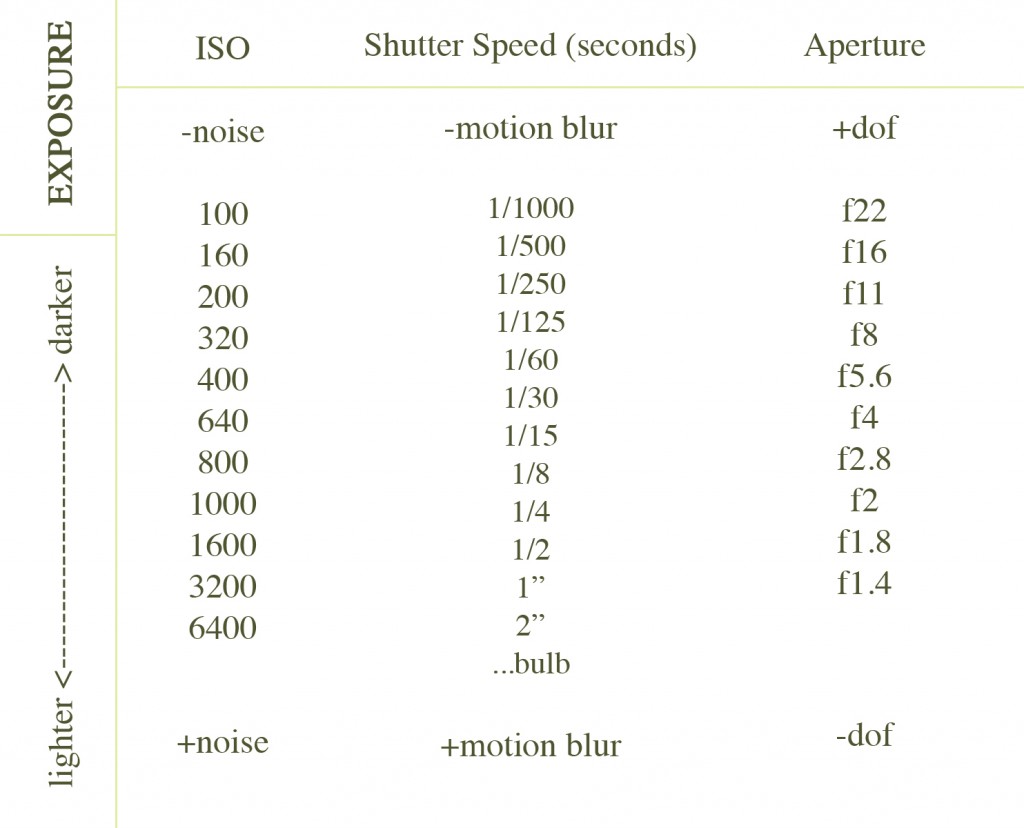
This second chart is a more visual reminder (with numbers!) of how the exposure will be effected by adjusting your ISO, Aperture, and Shutter Speed.
(*Note: “dof” stands for Depth of Field. Please see a previous post about aperture and depth of field for a quick refresher)
Challenge
Since this is a “bring it all together” week and somewhat of a review of the last 3 tutorials, we wanted to make this week’s challenge a review as well. This week, take your camera out and practice with ISO, Shutter Speed, and Aperture again. Was one of the 3 elements of the exposure triangle your favorite to work with….or is there an element that you still need some practice with? We’ll leave this one up to you! Next week, come back and share your results. And let us all know how you adjusted your picture to get your desired results so we can all continue to learn!
Have you joined the Bloggography Flickr group yet? If not, go see what other members have added this week! And feel free to add your pictures to the group pool.
© 2010 – 2014, Food Fun Family. All rights reserved.


No, I don’t shoot in manual all that often (at least percentage-wise). Typically, I prefer to let the camera do some of the thinking for me. :)
So do you usually shoot in manual mode? We’re all about manual mode ourselves, but we also know other photographers who swear by aperture priority.
Just opened my new camera yesterday and am SO excited to play!
Thanks so much for this… I opened the book that came with the camera and about fell over… Couldn’t understand a thing :)
i definitely love your writing style, very useful.
don’t give up and also keep writing for the simple reason that it simply that is worth to follow it.
impatient to browse through even more of your posts, have a pleasant day ;)
I do so love your photo tips. Thanks!
Your tutorials are so great. I still want to spend a photography week with you…
I need to join the Flickr group…and then MAYBE I’ll get brave enough to post something. Maybe. :)
.-= Cecily R´s last blog ..Wordful Wednesday and 365 Week 9 =-.
I have been meaning to join you on the photo stuff when you announced it but life is crazy. Do you have them under a certain label so I can attempt to catch up
The Buzz
Brandy
THis is super helpful.
So I was playing so much my battery died. So excited cant’ wait to shoot some more!! How did NYC go today??
.-= Brandie´s last blog ..True Story Tuesday =-.
Awesome tutorial! I love using the window analogy when explaing this to other people!
.-= amy prikazsky´s last blog ..5 things Tuesday with a TWIST…. =-.
Awesome tutorial! Thanks for the printouts!
I will definitely be trying these out soon :)