About a month ago, another blogger friend of mine recommended that I sign up for Yummly, a site to browse through, collect and share recipes from your own site and around the web. My initial thought was not another social site…but I figured it was worth a little bit of my time to at least look into it.
Imagine my shock when Yummly became one of the TOP 3 REFERRERS of traffic to my site within the first week.
I am now singing Yummly’s praises, and I have helped and encouraged several of my friends to sign up for and start using Yummly as well. Since several of my friends had questions about how to get started on Yummly and what to do once you get there, I decided that a post on how to use Yummly was in order.
Even if you’re not a blogger who posts recipes, I think you’re going to LOVE the site!
Getting Started on Yummly: Sign Up, Profile and Preferences
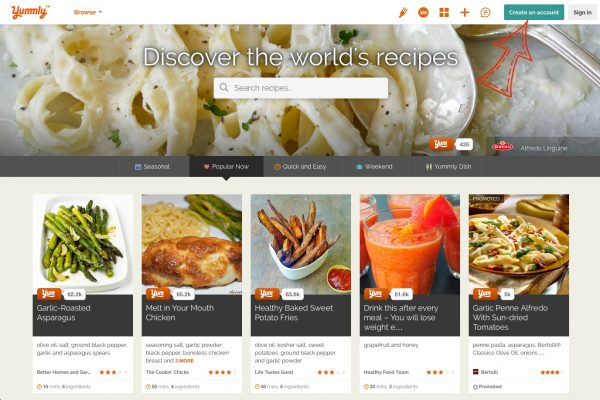
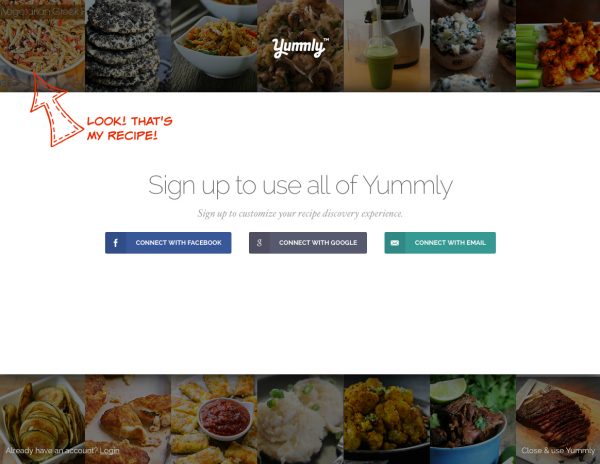
Signing up for Yummly is simple and quick. Just click the sign up button in the top right corner and choose your preferred method of signing in.
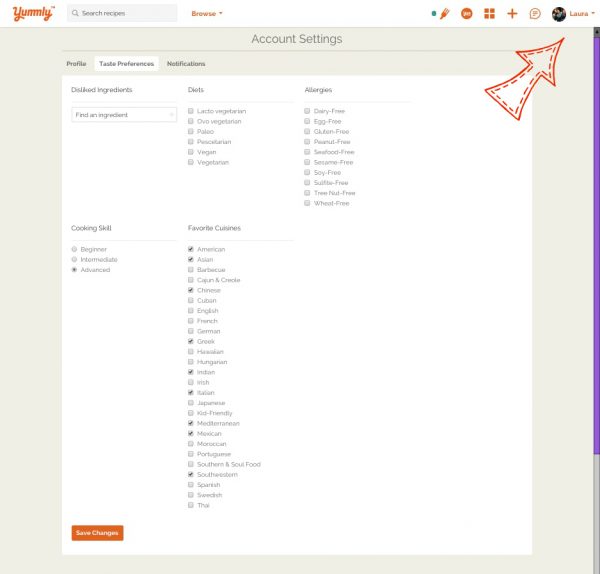
Once you’ve created a Yummly account, I’d recommend taking just a few minutes to fill out as many fields as possible in your profile (you can find your profile by clicking on your name in the top right corner of the page). You can link to your blog, Facebook, Twitter, and Pinterest pages there so that they show up in your profile.
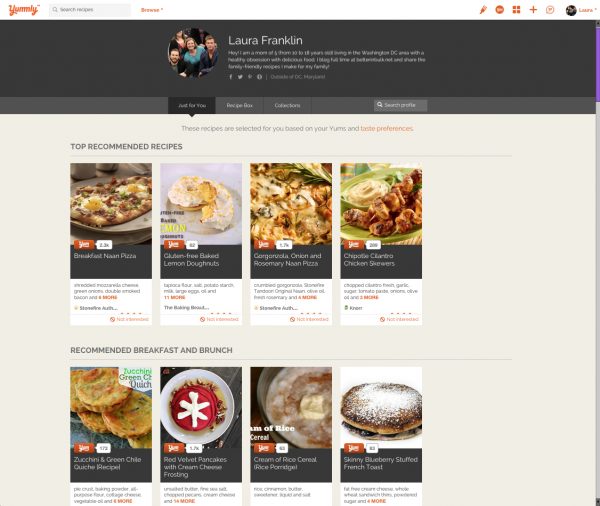
Next, fill out your taste preferences. Add any food allergies or special diets or ingredients that you don’t like as well as your favorite cuisines.
Filling out as much as possible in your profile will make the recipes that Yummly recommends to you even better. (The other thing that will help your recommendations be a better fit is “Yumming” more recipes, but we’re not quite there yet).
How to Add Recipes to Yummly
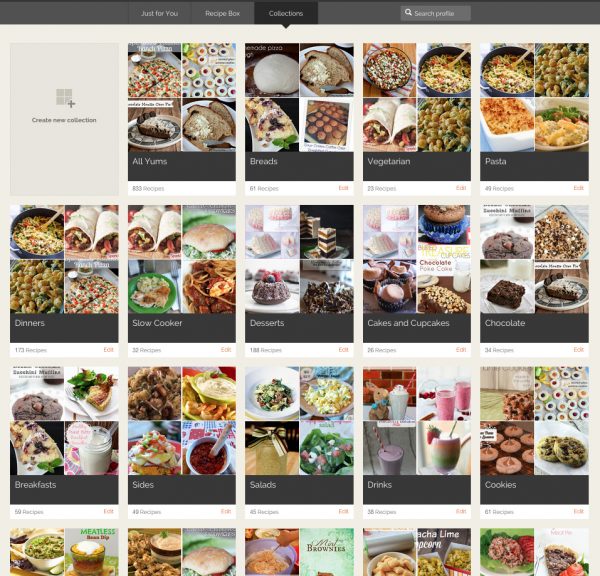
Once you’ve got your Yummly account created and your profile set up, you’ll want to start adding recipes. All recipes you “Yum” will be filed into your “All Yums” Collection, but to get the most out of Yummly, I recommend adding each recipe to relevant categories, or Collections, such as Cookies or Desserts. I also added a “Better in Bulk Recipes” category to my own page so that I can have a place to store all of my own recipes that I’ve yummed.
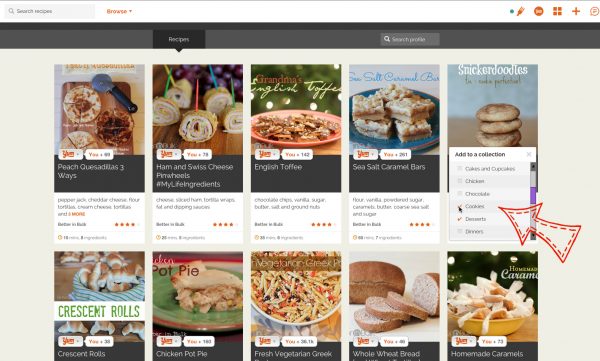
To add a recipe to a Collection, click on the Yum button on the recipe you’ve just added. A menu box will drop down with a few pre-selected categories. Feel free to create a few of your own Collections to customize your page even more.
When I first started out on Yummly, I kept my Collections very broad, but now that I’m using it more and more, I’ve started adding more specific collection titles. For instance, instead of just having one place for all Desserts, I’ve added “Chocolate,” “Cookies,” “Cakes and Cupcakes,” etc.
Note: Recipe titles and images are generated automatically from your post and cannot be changed at this point. I often have recipes that take a while to process. Some instantly pop up with the image and recipe description, and others take days. If you notice your recipes are showing up without an image or a link to your blog page (more on that below), there is not much you can do about it but wait. You haven’t done anything wrong. They are simply processing.
Add a Boorkmarklet or Social Share Button
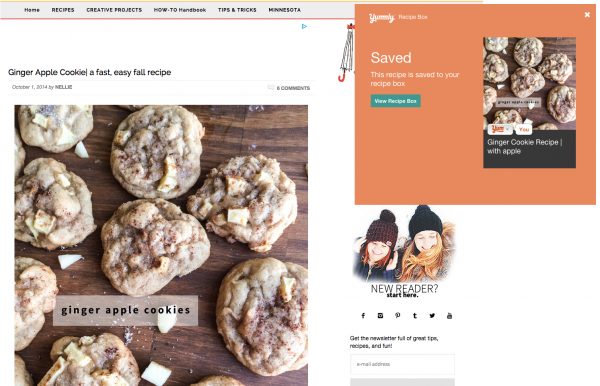
There are 2 ways to make adding recipes to your collections (and encouraging readers to add your recipes to their collections!): social share buttons and the Yummly Bookmarklet. The bookmarklet is easy to install (following the directions here) and is handy when I’m visiting other blogs with recipes I’d like to add to my Yummly collections. Any time I find a recipe I like, I just click the Yum bookmarklet in my browser toolbar and it’s added automatically. I can either add it to a collection right then or go to my Recipe Box on Yummly later to add it to relevant collections. This is what it looks like when you’ve successfully added a recipe (like this one on NellieBellie.com) using the bookmarklet:
I also added a Yummly social share button to all of my posts 2 days after I opened my Yummly account, hoping to encourage readers who are already on Yummly to add my recipes to their collections.
If you use SumoMe, Shareaholic, Simple Share Buttons (that’s what I have at the top of my post), AddToAny, E-MAILiT, or GetSocial you can add the Yum button. If your social share buttons don’t support Yummly, then ASK them to add it! The more people using Yummly and the easier it is to share, the better! You can also add your own Yum button directly to each post if you prefer.
Another fun tool that I haven’t started using yet is the Yummly Rich Recipes Plugin for WordPress, which not only makes your recipes Yummly-friendly, but adds an easy way for readers to Yum your recipe right from the recipe itself.
How to Set Up and Customize Your Publisher Page
The great news is…if you or someone else has started yumming your recipes, then a publisher page has already been automatically created for your blog!
To find your publisher page, locate one of your recipes on Yummly that has already processed. You should see your blog name near the bottom left side of the recipe card if you’re viewing from your Recipe Box, or on the left side on top of the recipe image if you’re viewing the recipe page. Click on your blog name, and you’ll be taken to your publisher page.
The next step is to fill out this form so that Yummly can update the information on your publisher page, like a description and profile image.
Note: If any recipes that you have added are not showing up on this publisher page, it just means that the recipe has not been processed yet (is not yet live on Yummly).
Watch the Traffic Come!
Of course, there’s never any guarantee that a site is going to bring you traffic, but Yummly has been fantastic for my blog, surpassing Pinterest most days! I spend a few minutes each day adding new recipes that I find, either through the recipes that Yummly recommends to me or through Facebook groups of bloggers that I admire, etc. One of my recipes is currently on Yummly’s homepage as one of the most popular on the site (I got lucky!) but even without that popular post, I’m still bringing in several hundred new visitors a day from Yummly.
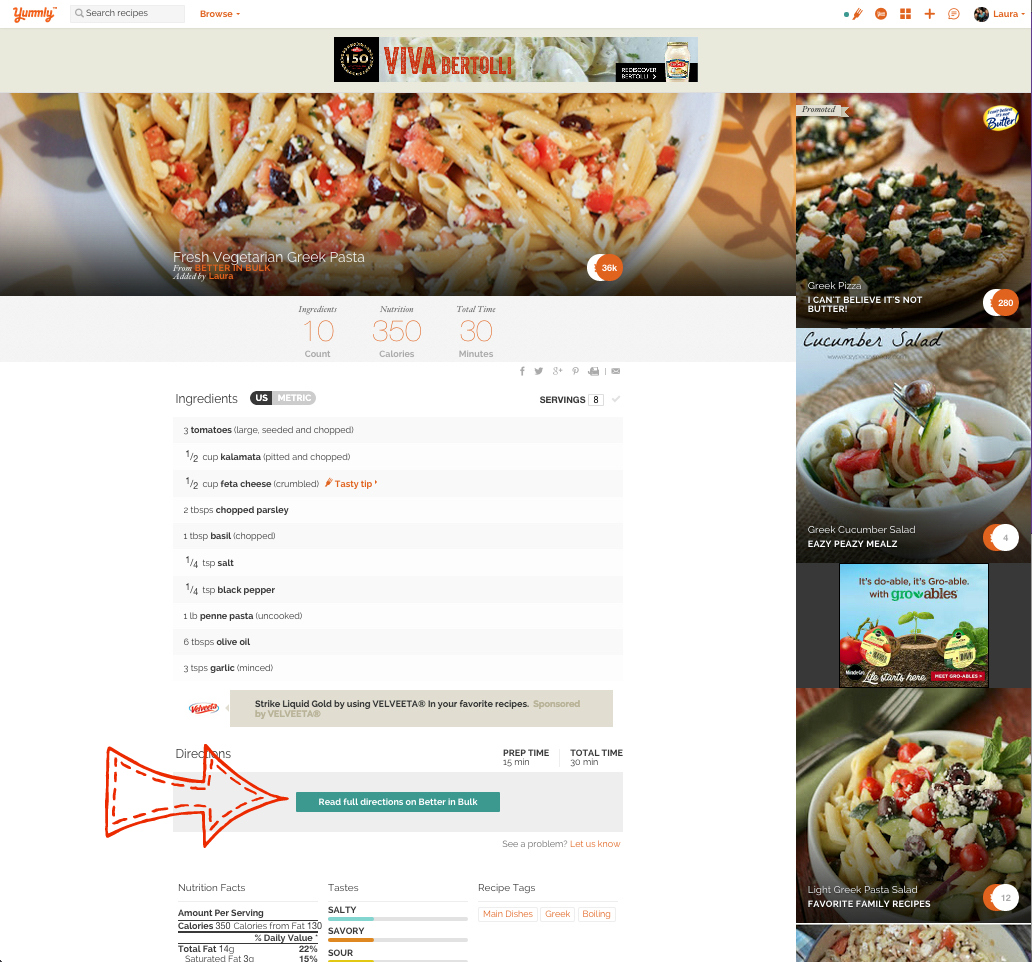
How it works: When you click on a recipe on Yummly, you’ll be brought to a page that looks like this:
Users can see the ingredients and basic nutrition facts about a recipe on Yummly, but they have to click the button near the bottom to “Read Full Directions on (Blog Name)” to get the instructions.
Why I like Yummly so much:
Traffic aside, the 2 things I love most about Yummly are:
- It’s simplicity of design and functionality: It’s easy to browse through recipes or search for recipes with specific ingredients. I’m not distracted with a bunch of other things. Yummly has delicious recipes. Period.
- Yummly has great recommendations for me: Because I’m using Yummly regularly, the recommendations are getting better and better. Unlike other social networks that are flooded with information that I might not want or need to see, Yummly feels like it’s customized just for me. I love that.
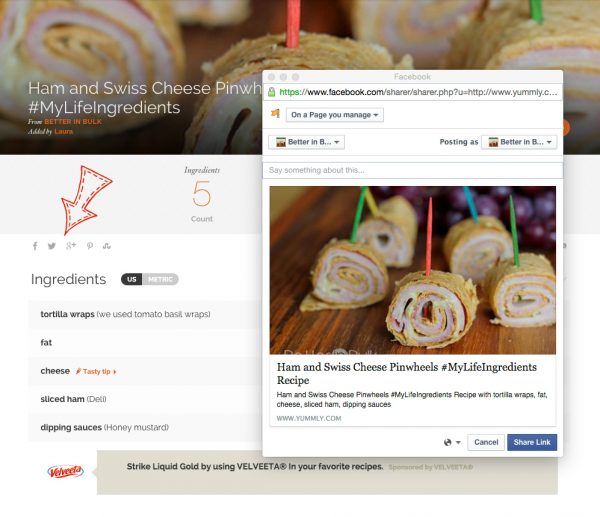
Another thing that I am just starting to try out is sharing Yummly recipes directly from the site, since they have several sharing options right there. I’m curious to see if I get more yums that way!
Are you on Yummly yet? If not, I highly recommend that you come join me there!
Note: The spoon image used above is from stock image site Graphic Stock.
© 2015, Food Fun Family. All rights reserved.


Thanks for the tips, I just started using it on my blog today. I hope it works well for me, looks like a great recipe site!
I’m so glad it was helpful for you! I hope Yummly can be a big help for your site! :)
Hi Lolli,
Just wanted to thank you for sharing your tips here. The screenshots were very helpful!
Thank you for this! I Googled for info on Yummly and your post popped up! Thanks for all the help.
I just started using Yummly! Thanks so much for writing this. I am always looking for new ways to get traffic to my blog!
I’m so glad I could help! :)
Thank you so much for sharing this! I had no idea how to use Yummly and this helped a ton!!
I hope it ends up being a great help for your blog, too! And thanks for the compliment. :) I feel the same way about other blogs that have better pictures than mine!
Thanks for the step-by-step tutorial! SIgning up is on my “to-do” list this week and I’ll be using your tutorial!
I basically signed up for Yummly after seeing how well it was working for you! Definitely bookmarking this tutorial!!!
Also, you have GREAT recipes!!! Challenging me to up my game!