
It’s very likely that you’ve seen those gorgeous, can’t-tell-they’re-not-real-pinecones chocolate pinecone treats on Pinterest. I was intrigued by the pinecones so I had to give them a try for this month’s Pinterest Remake challenge.
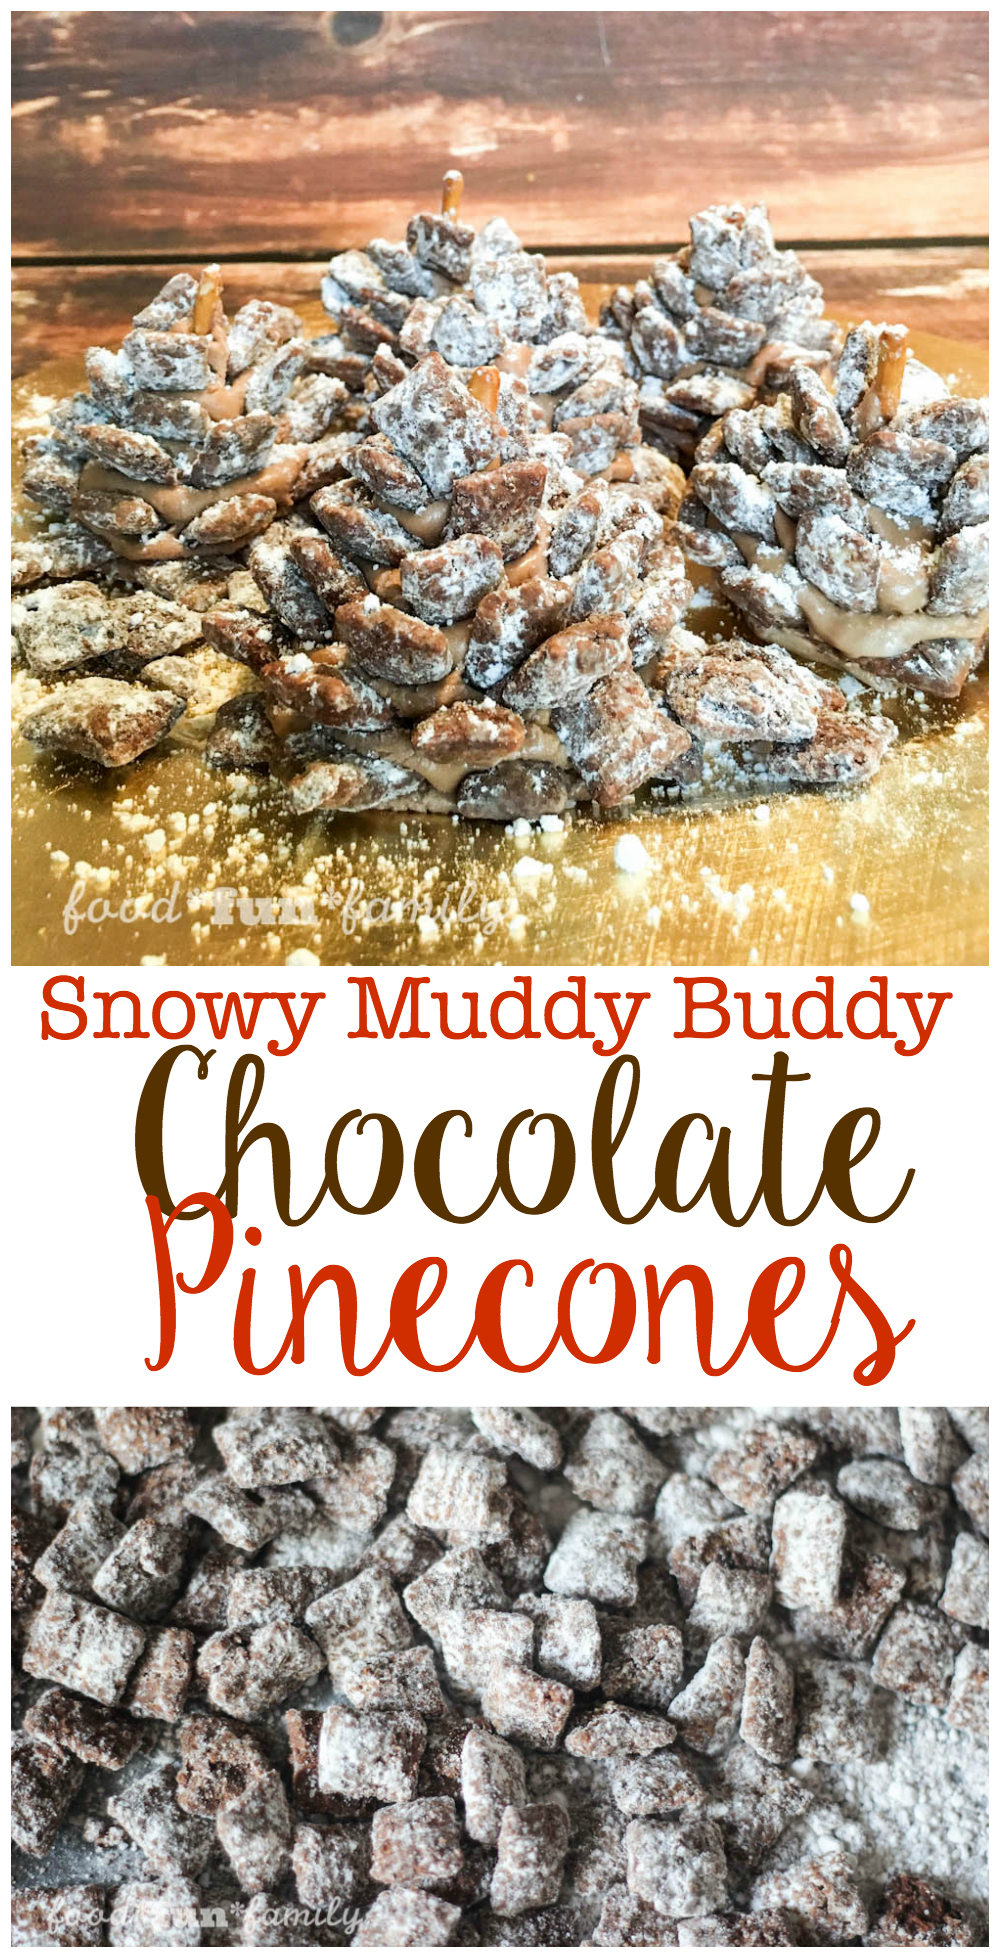
I learned a couple of things making my own version of this wintery treat: chocolate pinecones taste incredible (no one could stop eating them) and they are a whole lot harder to make than they sounded in the instructions. You’ve been warned. They just happen to be totally worth it.

When I read through the original recipe on Hand Made Charlotte, I decided that the first change I wanted to make was to use a classic muddy buddy recipe instead of plain cereal. I was NOT disappointed in this decision. I don’t make muddy buddies often (like maybe 3 times in the last 20 years?) so that in itself was a huge treat – for myself and for the kids (and husband) who couldn’t stay out of them. After we had finished the muddy buddy pieces, I had some of the pinecone base left and tried it with the plain cereal. Muddy buddies ALL the way, let me tell you!
- 4½ cups Chocolate Chex cereal (or other Chex flavor)
- ½ cup semisweet chocolate chips
- ¼ cup peanut butter
- 2 tablespoons butter or margarine
- ½ teaspoon vanilla
- ¾ cup powdered sugar
- ½ cup peanut butter
- ¼ cup Nutella
- 2 tablespoons coconut oil
- 1½ cups powdered sugar
- 6 pretzel sticks
- Powdered sugar for dusting
- Measure cereal into a large bowl; set aside.
- In microwavable bowl, microwave chocolate chips, peanut butter and butter uncovered on High about 1 minute; stir. Add a 10-30 seconds as needed until mixture can be stirred smooth. Stir in vanilla. Pour mixture over cereal, stirring until evenly coated.
- Sprinkle powdered sugar over cereal and toss gently with large spoon or hands until evenly coated.
- Mix peanut butter, Nutella, coconut oil, and powdered sugar in a bowl. I found it easiest to knead with my hands at the end. Add additional powdered sugar if needed to make a firm dough.
- Separate dough into 6 equal parts. I found it helpful to chill the base sections you aren't using in refrigerator while you're working on the other pinecones.
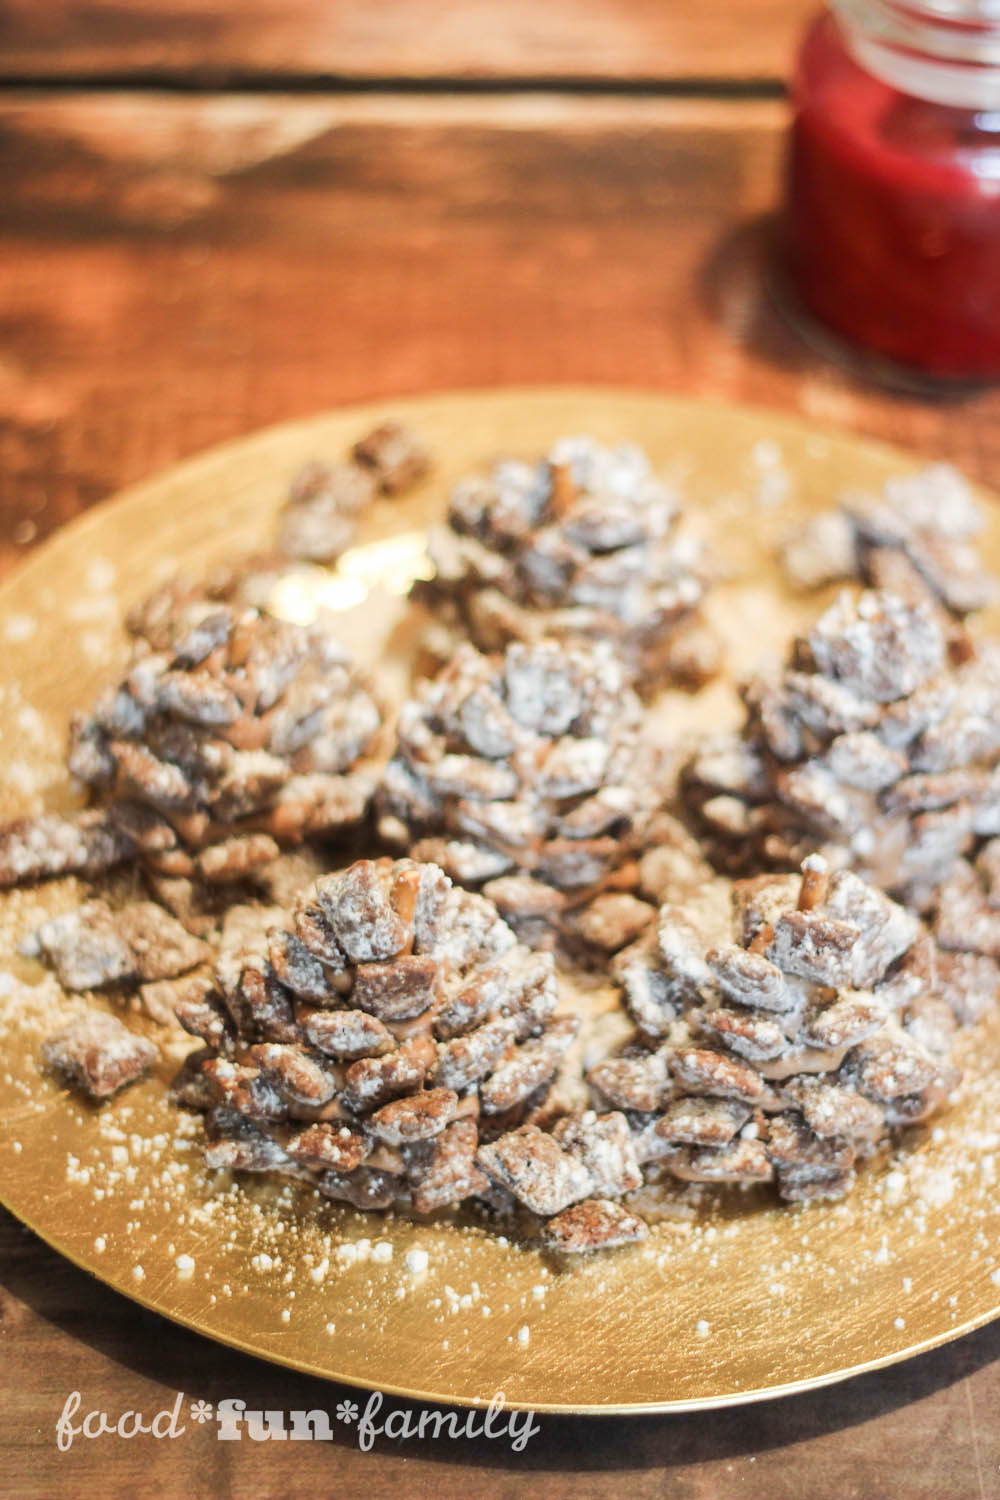
- Form each of the sections of pinecone base into cones with the large part on the bottom. Stick a pretzel stick through the top for a little stability. Sprinkle work area generously with powdered sugar so the pinecone won't stick when you try to move it.
- Beginning at the bottom of the cone, stick cereal (muddy buddy) pieces around the base. Work up the pinecone, sticking cereal pieces into the base, angled so that the cereal points upwards. Keep working upwards and around until you've covered the entire "pinecone" with cereal. I angled my cereal pieces more as I got closer to the top.
- Dust each pinecone with powdered sugar. To eat: remove the cereal pieces from the base (and be sure to grab a little bit of that Nutella and peanut butter dough in each bite!).
Some process photos:


A few notes: The base “dough,” no matter what I did, was determined to fall. You have to work kind of fast to assemble each one before it ends up looking like a big, messy blob of chocolate and cereal. The powdered sugar does a really good job of hiding imperfections, but it’s still hard to make these look as pretty as the original poster’s. Granted, that could have something to do with the fact that I substituted coconut oil for the butter in the base. Regardless of the tendency for this dough to be a little messy, the taste made up for any headache. I personally loved the slight coconuty taste. Next time, I might decrease the amount of coconut oil to 1 tablespoon to see if that would help the consistency of the base.


There WILL be muddy buddy mix left over after you assemble your pinecones. Unless you snack on them the entire time. Not that that happened in our house or anything…Just warning you that you will not need to use all of the cereal to create the 6 pinecones.
Have fun making your pinecones (and eating them, too, of course!).
For more Pinterest Remakes, here are a few of my favorite bloggers:
- Peppermint Body Scrub in 5 Minutes by Confessions of an Overworked Mom
- Maple Roasted Carrots by Upstate Ramblings
- Stamped Alcohol Inked Coasters by How Was Your Day?
- Acorn Squash Stuffing Recipe by A Mom’s Take
- How to Make Lightbulb Christmas Ornaments by Jennifer Sikora
- Winter White Red Velvet Fudge by Mom Does it All
- How to Make a Coffee Filter Wreath by Mom Always Finds Out
- Gluten Free Chocolate Chip Pumpkin Pie Bars by Home and Garden Cafe
- Coconut Crescent Layer Bars by Sincerely, Mindy
- Make your Own Christmas Tree by 2Boys+1Girl=OneCrazyMom
- Do It Yourself Cork Coasters by Philzendia
© 2015, Food Fun Family. All rights reserved.
These are so adorable and I think that I would have fun making these with my daughter and niece! Thanks for an awesome recipe.
Those are super cute and would make a great centerpiece at the kids’ table for Christmas! I know my kids would love eating them.
What a cute and yummy idea! My daughter would really love to make this!
This is a really cute idea and I am sure taste super good but I am not sure I would take the time to make these. lol
I can’t believe how much they really resemble pine cones. What a cute idea!
Those look so delicious! I love muddy buddies anyway so I cannot imagine this tasting bad!
These Chocolate Snowy Pine cones are adorable! I really like them. You did a very good job in creating such a nice item to have out for the Holidays.
Very cute but I am not sure I would have the patience you have to make this ;) I think I will stick to just eating muddy buddy mix LOL
That is so cute. They really do look like pinecones!